Contents
- Step-by-Step Instructions to Repair Your Leaking Balcony
- Identify the Source of the Leak
- Visual Inspections and Water Tests
- Calling in a Professional
- Remove the Old Flashing Membrane
- Prepare the Surface for Installation
- Install the New Flashing Membrane
- Ensure Proper Sealing and Waterproofing
- Identifying the Problem
- Making the Necessary Repairs
- Applying a Waterproof Membrane
- Using Suitable Sealant
- Regular Checks and Maintenance
- “
Contents
- Step-by-Step Instructions to Repair Your Leaking Balcony
- Identify the Source of the Leak
- Visual Inspections and Water Tests
- Calling in a Professional
- Remove the Old Flashing Membrane
- Prepare the Surface for Installation
- Install the New Flashing Membrane
- Ensure Proper Sealing and Waterproofing
- Identifying the Problem
- Making the Necessary Repairs
- Applying a Waterproof Membrane
- Using Suitable Sealant
- Regular Checks and Maintenance

Addressing a leaking balcony is something that many homeowners have to deal with throughout the year. Balconys are often prone to leaks due to various reasons. Whether it’s the failure of waterproofing materials, rotted or damaged boards, or poorly maintained drainage systems, leaks can cause significant damage to your property if not addressed in a timely manner.
Before making any repairs, it’s essential to identify the source of the leak. This can usually be done by visually inspecting the balcony and checking for any signs of water damage. Pay close attention to the tiled surfaces, joints, and any areas where water may be seeping through. Sometimes, the problem may be as simple as resealing the joints or applying a thin layer of waterproof paint to the affected areas.
If you’re not confident in your DIY skills or if the problem seems more serious, it’s always wise to contact a professional. They have the expertise and equipment to address any structural issues and ensure a watertight and long-lasting solution.
In general, repairing a leaking balcony involves several steps. Here’s a step-by-step guide:
1. Identify the Source of the Leak

Begin by identifying where the water is coming from. Check the drains and make sure they’re not clogged. If the balcony is tiled, check for any cracked or loose tiles that may be allowing water to seep through. Address these issues first before moving on to the next steps.
2. Inspect the Balcony for Structural Damage
Check the balcony boards and joists for signs of rot or other structural damage. Rotted boards should be replaced, and any damaged joists should be repaired or reinforced. It’s essential to ensure that the balcony is structurally sound before proceeding with any further repairs.
3. Apply a Waterproof Membrane
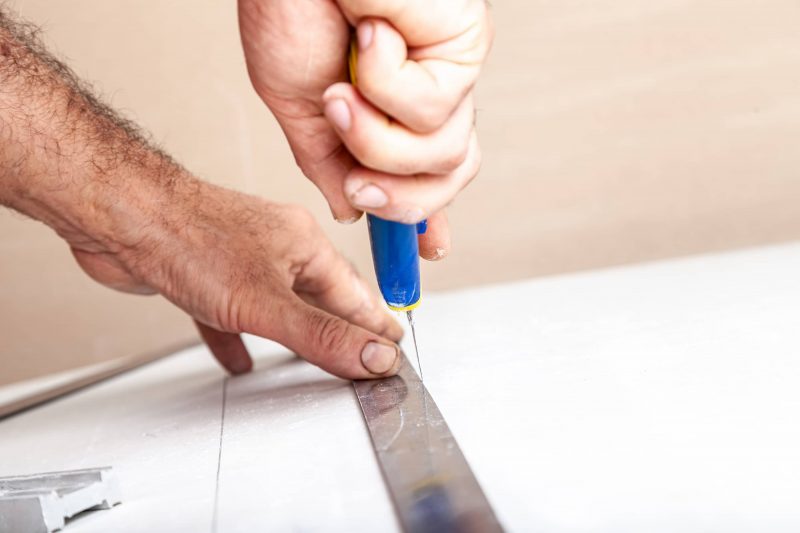
Using a high-quality waterproof membrane, apply a thin layer over the entire balcony surface. Pay extra attention to the joints and any areas prone to leakage. The membrane should create a watertight barrier to prevent any future leaks.
4. Cover the Balcony with Cement Boards
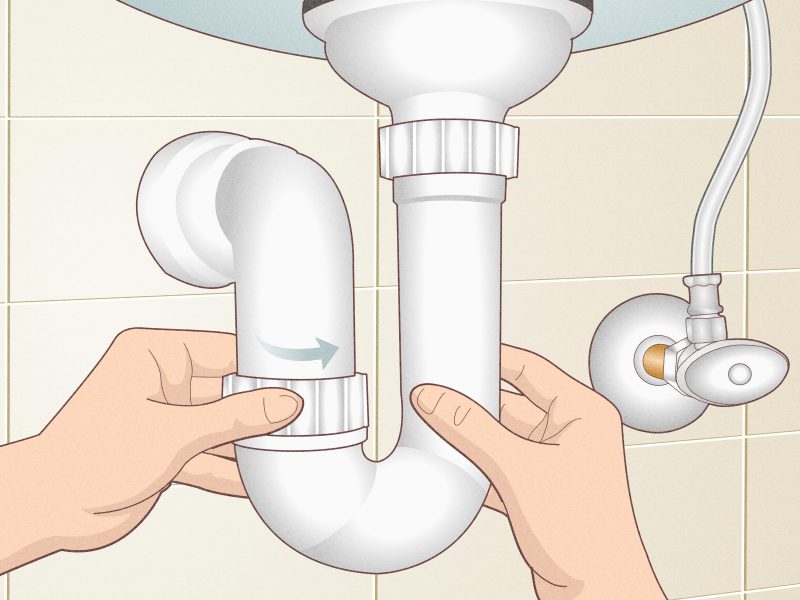
To provide an additional layer of protection, cover the balcony surface with cement boards. These boards are strong, durable, and will help prevent water from seeping through. Secure the boards in place using screws or adhesive.
5. Create a Watertight Seal
Using flexible caulking or an appropriate sealant, create a watertight seal around the edges of the cement boards and any joints. This will further prevent water from entering and causing leaks.
6. Perform Regular Checks and Maintenance
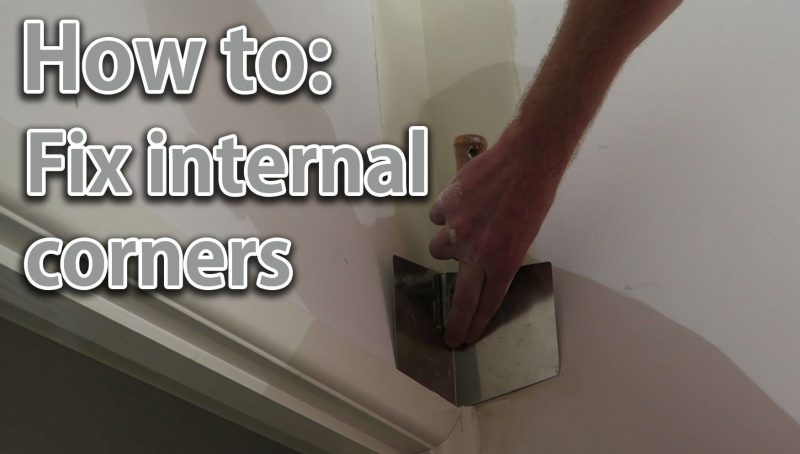
Once the repairs are complete, it’s important to regularly check and maintain the balcony. Inspect the surface for any signs of damage or wear and tear. Keep the drainage system clear and free from debris. By staying vigilant and addressing any issues promptly, you can ensure a leak-free balcony for years to come.
Remember, safety should always be a priority when working on any DIY project. Use appropriate protective gear, such as gloves and goggles, and be careful when working at heights. If you’re unsure about anything or if the problem seems too complex, don’t hesitate to seek professional help.
Step-by-Step Instructions to Repair Your Leaking Balcony
If you’re experiencing a leaky balcony, it’s important to address the problem promptly to prevent further damage to your property. Here are six simple steps to help you fix the issue:
Step 1: Identify the Source of the Leak
The first step in fixing a leaking balcony is to locate the source of the water. Check the joints, tiling, and any damaged or rotted structures. This will help you determine the extent of the damage and the best way to address it.
Step 2: Seal the Leaky Area
Using a suitable sealant, such as silicone or rubber, apply a thin layer to the surface that needs to be sealed. Make sure the area is clean and dry before applying the sealant. Be careful not to apply too much, as it may create a watertight barrier that can lead to other issues.
Step 3: Apply Waterproofing Membrane
To create a long-term solution, consider applying a waterproofing membrane over the sealed area. This will provide an extra layer of protection against future leaks.
Step 4: Repair or Replace Damaged Materials
If the leak is due to damaged or rotted materials, such as flooring or tiling, it’s essential to address the underlying issue. Remove any damaged materials and replace them with new ones. Be sure to use materials that are specifically designed for outdoor use and are moisture-resistant.
Step 5: Address Drainage Issues
Having proper drainage is crucial for preventing future leaks. Make sure the balcony has adequate drainage systems in place, such as drains or gutters, to direct water away from the surface.
Step 6: Maintain and Check Regularly
After fixing the leak, it’s important to maintain the balcony properly to prevent future issues. Regularly check for any signs of damage, and address them promptly. Additionally, make sure to keep the balcony clean and free from debris that could cause clogging or water accumulation.
In conclusion, if you’re experiencing a leaky balcony, it’s important to address the problem as soon as possible. By following these steps, you can repair the leak and prevent further damage to your property. However, if you’re unsure or the issue persists, it’s always best to consult with professionals who can provide a tailored solution to your specific situation.
Identify the Source of the Leak
One of the first steps in addressing a leaking balcony is to accurately identify the source of the leak. Leaks can occur from various areas, both on the interior and exterior of your balcony. It is important to inspect each side of the balcony thoroughly, including the walls, floor, and ceiling, to determine where the water is coming from.
There are several potential causes of balcony leaks. One common culprit is damaged or deteriorated flashing, which is the waterproof sealant that is applied to the balcony’s edges and connections. Flashing can degrade over time, leading to water penetration and leaks. Additionally, cracks or gaps in the balcony’s concrete or masonry surfaces can also allow water to seep through.
Another possible cause of leakage is problems with the balcony drains. If the drain is clogged or not functioning properly, water can accumulate on the balcony and eventually find its way into your property. It’s essential to check the drain regularly and clear any debris or blockages to ensure proper water drainage.
Sometimes, leaks can also be caused by issues with the balcony’s waterproof membrane. If the membrane is damaged or not properly applied, it can fail to create a watertight seal, leading to water infiltration. Checking the condition of the membrane and addressing any problems is crucial in preventing leaks.
Visual Inspections and Water Tests
To identify the exact location of the leak, you can perform visual inspections and water tests. Look for any signs of water stains, mold, or rotting on the balcony’s surfaces. Pay close attention to areas where the balcony connects with other structures, such as walls or doors, as these are common areas for leaks to occur. You can also use a thin board or a piece of mesh to assist in determining the source of the leak.
A water test can be conducted by pouring water onto specific areas of the balcony and observing if it starts leaking into the property. Be careful not to flood the entire balcony, as this can cause further damage. Start by pouring water on the suspected areas and gradually increase the amount if necessary.
Calling in a Professional
If you are unsure about identifying or solving the leaky balcony problem yourself, it may be best to consult a professional. A qualified contractor or waterproofing specialist can conduct a thorough inspection, pinpoint the source of the leak, and provide expert advice on how to fix it. They have the experience and knowledge to address the issue properly, ensuring a long-term solution.
In conclusion, identifying the source of the leak is crucial when dealing with a leaking balcony. Whether it’s addressing problems with flashing, drains, or waterproofing, taking the necessary steps to stop the leaks will protect your property from water damage and maintain the overall integrity of your balcony.
Remove the Old Flashing Membrane
When it comes to balcony restoration, one of the most common problems you’ll need to address is a leaking balcony. Leaks can cause damage to the structure of your property, and it’s important to repair them as soon as possible to prevent further issues down the line.
The first step in fixing a leaky balcony is to remove the old flashing membrane. Flashing membranes are thin rubber or silicone materials that are applied to the connection points between the balcony and the building. Over time, these membranes can become damaged or wear out, creating a pathway for water to seep through.
To remove the old flashing membrane, you’ll need to carefully pry it away from the surfaces it is sealed to. Be gentle to avoid causing any additional damage to the balcony or building. You may need to use a scraper or a knife to help loosen the membrane from the surfaces.
Once the old membrane is removed, you’ll want to thoroughly clean the area. Use a brush or a broom to remove any dirt, dust, or debris that may have accumulated. It’s important to have a clean surface before applying a new flashing membrane.
Before continuing with the repair, take the time to inspect the drainage system of your balcony. Clogged drains or inadequate drainage can be a common cause of balcony leaks. Clear any debris or obstructions from the drains and ensure they are functioning properly.
Now that the old flashing membrane is removed and the drainage is checked, it’s time to apply a new one. There are several ways you can go about this, but one common option is to use a liquid membrane. These can be brushed or rolled on and create a flexible and waterproof seal.
Another option is to use a membrane that comes in sheets or rolls. These membranes are usually made from rubber or other similar materials and can be cut to fit the size and shape of your balcony. They are then applied using a sealant or cement to create a watertight seal.
Regardless of the type of membrane you choose, it’s important to follow the manufacturer’s instructions for application carefully. Take your time and ensure the membrane is properly adhered to the surfaces and that there are no gaps or bubbles.
Once the new membrane is in place, it’s a good idea to go over the seams and connection points with a silicone sealant for added protection. This will help to create an even stronger seal and prevent any potential leakage.
Fixing a leaking balcony can be a DIY project, but it can also be a complex and time-consuming process. If you’re not comfortable or experienced in this type of repair, it may be best to hire a professional technician to ensure the job is done correctly.
In general, maintaining a leak-free balcony requires regular inspections and checks. Look for any signs of damage or wear and address them promptly. Taking good care of your balcony and addressing any issues early on can save you from costly repairs and nightmares down the line.
Prepare the Surface for Installation
Before you start repairing a leaking balcony, it’s essential to properly prepare the surface to ensure a long-lasting and effective solution. Here’s how:
- Identify the issues: Inspect your balcony thoroughly to understand why it’s leaking. Common reasons include damaged flashing, rotted boards, or poorly sealed joints.
- Clear the surface: Remove any flooring or tiles that are covering the balcony to access the damaged areas. Make sure to carefully remove all debris and clean the surface.
- Check the joists: Examine the structural integrity of the balcony by inspecting the joists. If they are rotted or damaged, they need to be replaced to create a structurally sound balcony.
- Repair or replace: Address any issues identified in Step 1 by either repairing or replacing the damaged components. This may involve fixing the flashing, sealing joints, or replacing rotting boards.
- Apply a waterproof membrane: To ensure a watertight seal, apply a waterproof membrane throughout the balcony surface. Choose a suitable membrane material that is flexible and can withstand movement without cracking.
- Seal joints: Use a high-quality silicone sealant to create a waterproof seal on all joints and connections on your balcony. This will prevent water intrusion and leaks.
- Apply flashing: Install flashing around the edges and connections of your balcony. This is crucial in preventing water from seeping into the building structure.
- Resealing or re-tiling: If your balcony was previously tiled, you can choose to reseal the tiles or opt for new ones. Make sure the chosen flooring option is suitable for outdoor use and provides adequate waterproofing.
- Check for visual and final inspection: After completing the above steps, visually inspect the entire balcony to ensure all repairs have been properly executed. This will help you identify any missed spots or issues that require attention.
- Maintaining and resealing: Keep in mind that maintaining your balcony is important for preventing future leaks. Regularly reseal joints and inspect the surface for any signs of water intrusion.
By following these steps and using suitable materials, you can solve common balcony leaking issues and create a waterproof and safe outdoor space for your family to enjoy. If you’re unsure about any step or encounter complex problems, it’s recommended to consult a professional technician to provide guidance and ensure a successful repair.
Install the New Flashing Membrane
After identifying and fixing any underlying issues, it is time to install a new flashing membrane to prevent future leaks. This step is crucial in maintaining a safe and dry balcony.
To begin, ensure that the surface is clean and free from any debris. Use a brush or broom to remove any dirt or dust. It is important to have a clean surface to ensure proper adhesion of the new membrane.
Next, choose a high-quality flashing membrane that is specifically designed for outdoor use and waterproofing. There are several options available on the market, so be sure to select one that fits your needs. Look for membranes that are flexible and can withstand movement without cracking or tearing.
Apply a layer of sealant along the edges and joints of the balcony. This will create a watertight seal and prevent any water intrusion. Be generous with the sealant to ensure maximum protection.
Once the sealant has been applied, carefully roll out the flashing membrane onto the balcony surface. Press it firmly down to ensure good adhesion. It is recommended to start from one side of the balcony and work your way towards the other side.
While installing the membrane, be mindful of the drainage system. Ensure that the membrane is properly aligned with the drain or drains to allow water to flow away from the balcony. This is crucial in preventing any water buildup and leakage.
If your balcony is tiled, thoughtfully cut the membrane to fit around the tiles. This will provide an extra layer of protection and ensure that there are no gaps where water can seep through.
Once the membrane is in place, apply another layer of sealant over the entire surface. This will further strengthen the waterproofing and create a long-term solution for your leaking balcony. Allow the sealant to dry overnight before using the balcony again.
In general, it is always recommended to seek professional help when repairing a leaking balcony. However, if you are confident in your DIY skills and have thoroughly checked the balcony for any underlying issues, this step-by-step guide can help you solve the problem. Remember to choose high-quality materials and follow the steps carefully to ensure a successful repair.
- Step 1: Clean the surface
- Step 2: Choose a high-quality flashing membrane
- Step 3: Apply sealant along edges and joints
- Step 4: Roll out the flashing membrane
- Step 5: Align with the drainage system
- Step 6: Cut the membrane around tiles if necessary
- Step 7: Apply another layer of sealant
By following these steps, you can fix a leaking balcony and create a safe and dry outdoor space for you and your family to enjoy.
Ensure Proper Sealing and Waterproofing
One of the key reasons balconies leak is due to improper sealing and waterproofing. It is crucial to have a watertight seal between the balcony and the rest of the property to prevent water intrusion. When a balcony is not properly sealed, water can seep into the structure, leading to rotting and structural damage.
Here are some steps to ensure proper sealing and waterproofing:
-
Identifying the Problem
The first step in fixing a leaky balcony is to identify the source of the problem. This can be done by conducting a visual inspection of the balcony and checking for any signs of water intrusion. Look for cracks, gaps, or damaged sealant along the edges and connections of the balcony.
-
Making the Necessary Repairs
Once the problem areas have been identified, it is important to fix them promptly. This may require resealing the balcony, replacing rotting boards, or fixing any structural issues. If you are not comfortable making these repairs yourself, it is best to contact a professional technician who specializes in balcony restoration.
-
Applying a Waterproof Membrane
After making the necessary repairs, it is essential to apply a waterproof membrane to the balcony’s surfaces. This thin layer acts as an extra barrier against water intrusion and helps to ensure the balcony remains watertight. There are various waterproof membranes available on the market, so be sure to choose one that is suitable for your balcony’s specific needs.
-
Using Suitable Sealant
In addition to a waterproof membrane, it is important to apply suitable sealant to all joints, connections, and areas where water can potentially seep through. The sealant should be strong, flexible, and weather-resistant to provide long-lasting protection against leaks. Be careful to follow the manufacturer’s instructions when applying the sealant to ensure it bonds properly.
-
Regular Checks and Maintenance
Once the balcony has been repaired and waterproofed, it is essential to perform regular checks and maintenance. Inspect the balcony at least once or twice a year to identify any signs of wear, damage, or potential leaks. Addressing any issues early on can help prevent further damage and costly repairs in the future.
By following these steps and ensuring proper sealing and waterproofing, you can effectively fix a leaking balcony and prevent water intrusion into your property. Remember to be careful and take necessary precautions whenever working at heights or dealing with potentially hazardous materials. If you’re unsure about any aspect of the repair process, it’s always a good idea to consult with professionals who have expertise in balcony repairs.
“
Can I fix a leaking balcony myself?
Yes, you can fix a leaking balcony yourself if you have the necessary skills and tools. However, it is important to assess the extent of the damage and determine if it is within your capabilities to repair.
What are the common causes of a leaking balcony?
The common causes of a leaking balcony include damaged or deteriorated waterproofing membrane, cracked or missing tiles, poorly sealed joints, and inadequate drainage system.
What materials do I need to fix a leaking balcony?
To fix a leaking balcony, you may need materials such as waterproofing membrane, sealant, grout, tiles, and waterproofing primer. The specific materials required will depend on the nature and extent of the damage.
When should I contact a professional for balcony leak repair?
You should contact a professional for balcony leak repair if the damage is extensive, beyond your skill level, or if you are unable to identify the source of the leak. It is also advisable to seek professional help if the balcony is located on a higher floor or if you are unsure about the repair process.


 Enhance Your Home’s Appeal and Functionality with Sliding Glass Balconies
 Step-by-Step Guide – How to Replace Broken Glass in a Patio Door
 A Few Common Reasons Why Balconies Leak – Tips for Balcony Waterproofing