Contents
- Planning and Designing Your Porch
- Preparing the Site and Foundation
- 1. Choose the location and size
- 2. Obtain necessary permits
- 3. Dig the foundation
- 4. Choose the foundation type
- 5. Build the foundation
- 6. Consider additional add-ons
- Framing and Building the Porch Structure
- Installing the Flooring and Decking
- Selecting the Right Flooring and Decking
- Preparing for Installation
- The Installation Process
- Adding the Roof and Coverings
- Building Porch Stairs: Tips and Techniques
- Choosing the Right Type of Stairs
- Considerations for Stair Design and Materials
- Installation and Cost Factors
- Actual Costs and Time Schedule
- Question-answer:

Building a porch is a great way to add curb appeal and value to your home. Whether you want to create a cozy space to enjoy your morning coffee or a grand entrance to welcome guests, a porch can be a beautiful addition to any house. In this step-by-step guide, we will show you how to build a porch from start to finish.
The first step in building a porch is to obtain the necessary permits and permissions. Check with your local building department to find out what permits you need to build a porch. It is important to follow all building codes and regulations to ensure your porch is safe and structurally sound.
Next, you will need to plan the design and size of your porch. Consider the style of your home and how you want your porch to look. There are many different styles and sizes of porches available, so take some time to research and find the one that best suits your needs.
Once you have a plan in place, it is time to gather your materials. The materials you will need will vary depending on the type of porch you are building, but some common materials include posts, columns, stairs, decking, and screening. You may also need screws, nails, and other hardware to complete the installation.
If you are a DIY pro, you may choose to build your porch from scratch. However, if you are not as experienced, there are pre-manufactured porch kits available that make the process much easier. These kits come with all the parts and instructions you need to build your porch without the need for extensive building knowledge.
When it comes to the actual building process, start by installing the foundation for your porch. This can be either a pier-style foundation or a foundation that is part of your existing house. Follow the instructions provided with your porch kit or consult a professional if you are unsure how to proceed.
Once the foundation is in place, it is time to start building the structure of your porch. This includes installing the posts, columns, and stairs. Again, follow the instructions provided with your porch kit or consult a professional to ensure everything is installed correctly and securely.
With the main structure in place, you can now add any additional features or add-ons you want for your porch. This may include skirting, screening, or doors. These add-ons will not only enhance the look of your porch but also add functionality and privacy.
After all the construction is completed, it is time for the final touches. This includes painting or staining your porch to protect it from the elements, as well as adding any decorative elements you desire.
Building a porch takes time and effort, but the benefits are well worth it. A porch can greatly enhance the appearance and value of your home, as well as provide a warm and inviting space to relax and enjoy the outdoors. With proper planning, materials, and construction techniques, you can create a porch that will stand the test of time.
For more information about building a porch and to see the available styles and sizes, visit our website at Conservatoryland. If you have any questions or need further assistance, feel free to give us a call. Our team of experts is always happy to help and guide you through the process.
Planning and Designing Your Porch
When it comes to building a porch, proper planning and designing are crucial. This stage sets the foundation for the labor and materials needed, as well as the overall costs and specifications for your porch. Here are some important factors to consider:
- Location: Decide where you want your porch to be built. The front of your house is a popular choice, but you can also consider extensions or alternative outdoor areas.
- Design: Think about the style and look you want for your porch. Take into account the architectural design of your home and choose a porch design that complements it.
- Permits and Codes: Before proceeding, check with your local building codes and obtain any necessary permits or permissions required for porch construction.
- Materials: Choose the type of materials you want to use for your porch. Wooden porches are a classic choice, but there are also pre-manufactured options available that could save you time and labor.
- Costs and Budget: Determine your budget and consider the costs associated with the materials, labor, and any additional features or customizations you want to add to your porch.
- Timeframe: Understand the timeframe for building a porch. It takes around 2-3 weeks for a typical custom-built porch and less time for pre-fabricated or prefab porches.
- Installation: Decide whether you want to build the porch yourself (DIY) or hire a professional contractor. Keep in mind that DIY options may be more cost-effective, but hiring a professional ensures quality and expertise.
- Benefits: Consider the benefits of adding a porch. Porches not only enhance the curb appeal of your home but also provide an inviting outdoor space for relaxation and entertaining.
By carefully planning and designing your porch, you can ensure that it meets your needs and desires while adding value to your home. Take the time to research and gather inspiration, and don’t hesitate to consult professionals or seek advice if needed.
Preparing the Site and Foundation
Before you begin building your porch, it’s important to properly prepare the site and foundation to ensure the functionality and longevity of your project. Here are some steps to follow:
1. Choose the location and size
Start by deciding where you want to build your porch. Consider factors such as the size of your property, the style of your home, and your local building code requirements. Take into account any existing structures and windows that the porch may affect.
2. Obtain necessary permits
Check with your local authorities to see if you need any permits to build your porch. Different areas may have specific regulations and specifications that you need to follow. Don’t forget to call your local utility companies to have the underground lines marked before you start digging.
3. Dig the foundation
Once you have obtained the necessary permits, you can start digging the foundation for your porch. The depth will depend on local codes and the frost line in your area. Excavate the area to the specified depth, ensuring that the bottom is level.
4. Choose the foundation type
There are several types of foundations to choose from for your porch, including concrete slabs, piers, and footings. Consider the climate and soil conditions in your area when selecting the most suitable foundation type for your project.
5. Build the foundation
Following the foundation specifications and design, begin building the foundation for your porch. This may involve pouring concrete, installing piers, or laying footings. Make sure to allow enough time for the foundation to properly set before proceeding with the rest of the construction.
6. Consider additional add-ons
While preparing the site and foundation, it’s a good time to think about any additional add-ons you may want for your porch. This could include stairs, railings, roof extensions, electrical outlets, and more. Customise your porch to fit your specific needs and preferences.
By properly preparing the site and foundation for your porch, you will ensure a solid and durable structure that will enhance the look and functionality of your home for many years to come.
Framing and Building the Porch Structure
Once you have selected the style and size of your porch, it’s time to start framing and building the porch structure. Here are some FAQs and tips to help you through the process:
1. Plan and Design:
Before you start building, make sure to plan the porch structure according to your needs and preferences. Consider the functionality and benefits you want to achieve with your porch. Keep in mind any local codes or regulations that may affect the placement and size of your porch.
2. Foundation:
The type of foundation you choose for your porch will depend on the location and soil conditions. It can be a concrete pad, piers, or even a pre-manufactured base. Make sure to check with local codes and regulations to ensure your foundation meets the necessary requirements.
3. Framing:
The actual framing of the porch structure will involve the installation of beams, posts, and columns. These components will provide support and stability to your porch. Make sure to follow the proper techniques and use suitable materials for a sturdy and long-lasting structure.
4. Roof and Roofing:
Choosing the right roof for your porch is important both for aesthetics and functionality. Consider factors like the slope, material, and color that will complement your house and withstand the weather conditions in your area. You may choose from various roofing materials such as asphalt shingles, metal, or even a glass roof for added natural light.
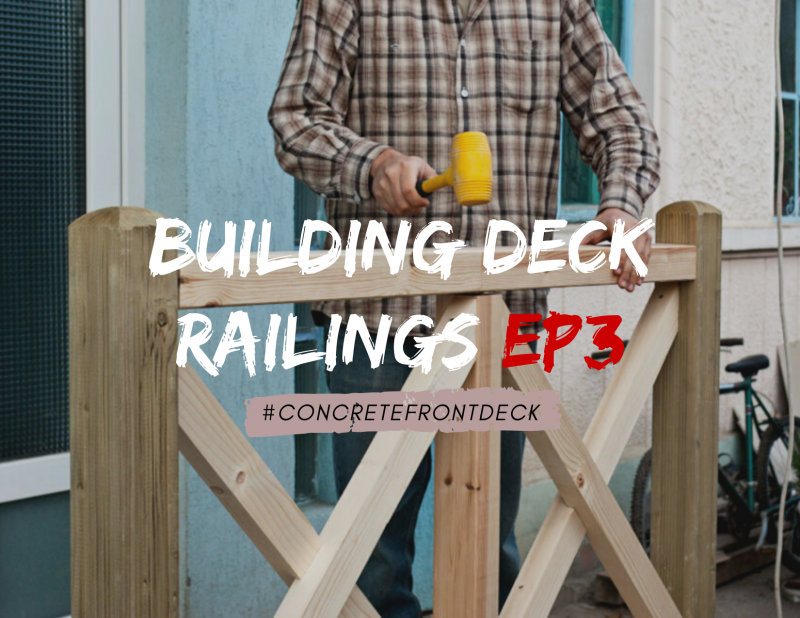
5. Balustrades and Stairs:
To ensure safety and aesthetics, balustrades and stairs are important elements to consider. Choose a style and material that matches your porch design and complements your home’s exterior. Whether you prefer wood, metal, or UPVC, make sure the balustrades meet local code requirements.
6. Windows and Doors:
Decide if you want to have windows installed in your porch structure. Windows can provide natural light and ventilation to the space. Similarly, doors are essential for easy access to and from the porch. Choose doors that are durable, weather-resistant, and suitable for your porch design.
7. Electrical Outlets and Lighting:
If you plan to use your porch for outdoor activities and entertainment, consider installing electrical outlets and lighting fixtures. This will provide convenience and enhance the ambiance of your porch. Make sure to hire a licensed electrician to ensure proper installation and compliance with electrical codes.
8. Skirting and Finishing touches:
Once the main structure is built, you can add finishing touches to make your porch ready for use. This may include skirting to cover the foundation, painting or staining the porch materials, and adding outdoor furniture and decor. Don’t forget to plan for landscaping elements such as flower beds, shrubs, and bushes to complete your outdoor oasis.
Remember, building a porch is a project that requires careful planning and consideration. If you’re not confident in your DIY skills, it’s always best to consult with professionals or hire reputable porch building services. They can help ensure that your dream porch becomes a reality while adhering to local codes and providing expert craftsmanship.
Installing the Flooring and Decking
Once the foundation and framework of your porch are in place, it’s time to install the flooring and decking. This is a crucial part of the project because it will determine the look and feel of your porch, as well as its durability.
Selecting the Right Flooring and Decking
There are several types of flooring and decking materials available for porches, and the choice will depend on your preferences and budget. Some popular options include wood, composite, and vinyl. Each type has its own pros and cons, so it’s important to consider factors such as cost, maintenance, and durability before making a decision.
If you’re unsure about which type of flooring and decking to choose, you can consult with a professional or do some research to learn more about each option. Additionally, you can browse through galleries or visit showrooms to see different styles and designs to get inspiration for your own porch.
Preparing for Installation
Before installing the flooring and decking, you need to make sure that the surface is properly prepared. This may involve cleaning, leveling, or repairing the foundation, depending on its condition. It’s also important to check with your local building codes and obtain any necessary permits.
In addition, you should have all the tools and materials needed for the installation. This may include hammers, saws, screws, and other equipment. If you’re not comfortable with DIY projects or don’t have the necessary tools, you may consider hiring a professional to ensure the job is done correctly.
The Installation Process
The installation process will vary depending on the type of flooring and decking you choose. For example, if you opt for wood, you will need to install the boards using nails or screws. If you choose a pre-manufactured kit, you may simply need to follow the instructions provided to assemble and attach the pieces together.
Regardless of the method, it’s important to take your time and follow the instructions carefully. This will ensure that the flooring and decking are installed correctly and will withstand the elements for years to come.
Once the flooring and decking are installed, you can add any additional features or customizations, such as balustrades, trimmings, or windows. This will further enhance the look and functionality of your porch, making it a welcoming and enjoyable space for you and your family.
In conclusion, installing the flooring and decking for your porch is a significant part of the project. It not only adds beauty and value to your home but also provides a functional outdoor space for relaxation and entertaining. Whether you choose to DIY or hire a pro, it’s essential to plan carefully, obtain the necessary permits, and follow the proper installation techniques to ensure a successful and long-lasting porch.
Adding the Roof and Coverings
After completing the foundations and constructing the main structure of your porch, it’s time to add the roof and coverings. This step takes your porch from just a basic structure to a final, polished addition to your home.
When it comes to the roof, there are various styles and types to choose from. You could opt for a traditional pitched roof or a flat roof, depending on your preferences and the specifications of your property. Before proceeding with this part of the project, be sure to check with your local authorities to obtain any necessary permits or permissions.
There are a few options when it comes to installing the roof on your porch. You could choose to hire a pro to do the job, or if you’re a skilled DIY-er, you might decide to tackle it yourself. If you’re considering the DIY route, make sure to carefully plan and schedule the installation process.
If you’re hiring a professional, they will usually start by installing the roof trusses or rafters, which provide the structure for the roof. Once the trusses or rafters are in place, they will install the roof sheathing, which is typically made of plywood or oriented strand board.
After the roof sheathing is installed, you have a few options for the roof coverings. Asphalt shingles are a popular and cost-effective choice, and they come in a variety of styles, colors, and sizes. Metal roofing is another durable and low-maintenance option that can be customized to suit your preferences. Other roof covering options include cedar shakes, slate, or even clay tiles.
When it comes to the actual installation of the roof coverings, it’s important to follow the manufacturer’s instructions and best practices. Ideally, this part of the project should be done on a day when there is no rain or strong winds. If you’re not comfortable working at heights or handling roofing materials, it’s best to leave this task to the professionals.
Adding a roof to your porch not only provides protection from the elements, but it also enhances the overall look and feel of the space. It can also increase the value of your home and create a beautiful outdoor extension that you can enjoy year-round.
Before starting the roof installation, make sure you have all the necessary materials and tools, including safety equipment such as harnesses and fall protection systems. If you’re unsure about any aspect of the project, consult with a professional or seek advice from your local home improvement store.
To see examples of different porch styles and roof designs, you can check out online galleries or look at homes in your neighborhood for inspiration. Remember that your porch should complement your home’s architecture and blend in with the overall design.
Adding a roof to your porch is a significant part of the construction process, and it requires careful planning and attention to detail. However, with the right materials and a well-executed plan, you can create a porch that not only adds value to your home, but also becomes a space where you can relax and enjoy the outdoors.
Building Porch Stairs: Tips and Techniques

When it comes to building a porch, one important aspect to consider is the stairs. Porch stairs not only provide access to your porch, but they also play a crucial role in enhancing the overall design and functionality of your porch. In this guide, we will take you through some tips and techniques for building porch stairs that will not only be functional but also add aesthetic value to your property.
Choosing the Right Type of Stairs
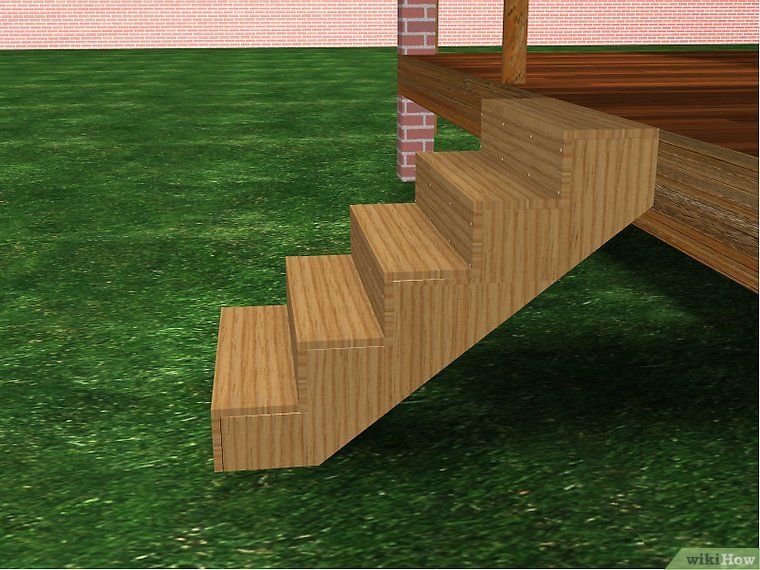
There are different types of stairs you can choose from when building a porch. The most common types include wooden stairs, pre-manufactured stairs kits, and custom-designed stairs. Each type comes with its own set of benefits and considerations. While DIY wooden stairs give you the freedom to customise the design and size according to your preferences, pre-manufactured stairs kits offer ready-made options that are quick to install. Custom-designed stairs allow you to create a unique style that perfectly suits your porch.
Considerations for Stair Design and Materials
When designing your porch stairs, it is essential to consider factors such as the style of your porch, the size of the stairs, and the material used. Wooden stairs are a popular choice for their warm and natural look, while other materials like metal or stone can add a touch of elegance or modernity. Balustrades and posts can also be chosen to complement the overall design of your porch.
Installation and Cost Factors
Regardless of the type of stairs you choose, the installation process requires careful planning and the right tools. If you are not confident in your DIY skills, hiring a professional for the installation is a cost-effective and time-saving alternative. However, installing stairs yourself can be a rewarding project if you have the right skills and tools.
Don’t forget to check local building codes and regulations before starting your porch stairs project. Permits may be required, and failing to obtain them can lead to costly setbacks and fines.
Actual Costs and Time Schedule
The actual costs of building porch stairs depend on several factors, such as the materials used, the size of the stairs, and any customisations you choose. It is essential to obtain quotes or estimates from contractors or use an online cost estimator to get an idea of the potential expenses.
The time it takes to build porch stairs will vary depending on the complexity of the design and the size of the project. Having a clear plan and schedule in place will help keep the project on track and ensure that it is completed efficiently.
In conclusion, building porch stairs is a key part of creating a welcoming and functional porch. Whether you choose a DIY approach or hire professionals for the job, it is important to carefully consider the design, materials, and installation process to ensure a successful outcome. With the right tools and attention to detail, you can create porch stairs that not only provide safe access but also enhance the overall beauty of your property.
Question-answer:
What materials do I need to build a porch?
To build a porch, you will need materials such as pressure-treated lumber, nails, screws, concrete, gravel, wood sealer, and paint.
Do I need to obtain any permits before building a porch?
Yes, in most cases, you will need to obtain the necessary building permits from your local government before starting the construction of a porch. It is important to check with your local building department for specific regulations and requirements.
Can I build a porch on my own, or do I need to hire a professional?
Building a porch can be a DIY project, but it depends on your level of expertise and experience with construction. If you are not confident in your abilities or if the project requires advanced skills, it is recommended to hire a professional contractor to ensure a safe and properly built porch.
How long does it usually take to build a porch?
The time required to build a porch can vary depending on the size and complexity of the project, as well as the availability of materials and the weather conditions. On average, it can take anywhere from a few days to a few weeks to complete the construction of a porch.
Are there any specific tips for maintaining a porch?
Yes, to maintain a porch, it is important to regularly inspect it for any damages or wear. Replace any rotted or damaged wood, and keep the porch clean from debris and dirt. Applying a wood sealer or paint every few years can also help protect the porch from weather damage. Additionally, be cautious with heavy furniture or excessive weight on the porch to prevent sagging or structural issues.
What materials do I need to build a porch?
To build a porch, you will need materials such as lumber, concrete, screws, nails, paint, and roofing materials. The specific materials you need will depend on the design and size of your porch.

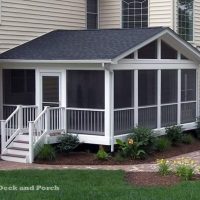 Create a Three-Season Room With a DIY Screened-In Porch
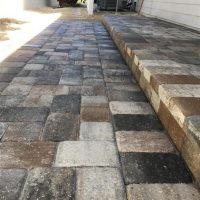 Expert Guide – Calculating the Number of Pavers You Need for Your Project
 When to Replace a Porch Column