Contents
- Benefits of Creating an Affordable DIY Patio
- Choosing the Right Patio Pavers
- Factors to Consider
- Choosing the Right Material
- Preparing the Foundation
- Laying the Pavers
- Finishing Touches
- Measuring and Preparing the Patio Area
- How to Cut Patio Pavers
- Installing the Patio Pavers
- Enhancing Your Outdoor Space with the Finished Patio
- 1. Add Furniture
- 2. Create Planting Gardens
- 3. Finish with Limestone or Polymeric Sand
- 4. Add Utilities
- 5. Enhance with Décor and Lighting
- Question-answer:
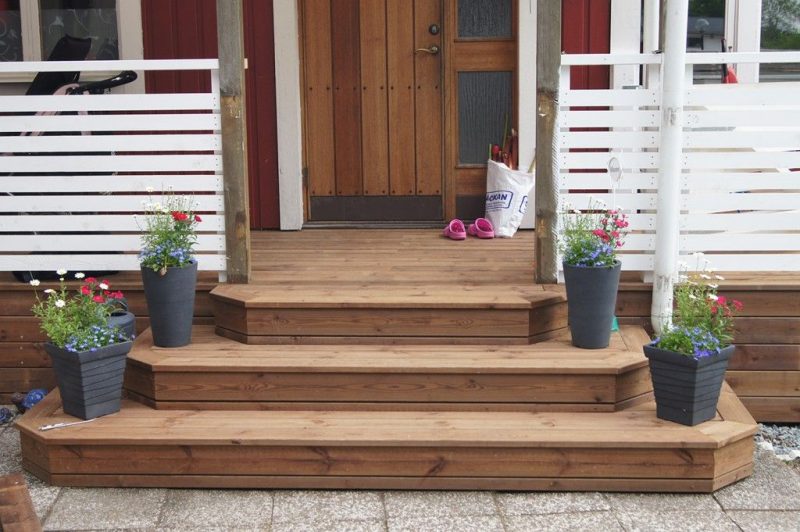
Creating a beautiful patio for your outdoor space is easier and more affordable than you might think. With just a few simple steps and some basic tools, you can transform your backyard into a cozy and inviting area for relaxation and entertainment. Whether you’re a seasoned DIY enthusiast or a novice builder, these tips will guide you through the process of building your own patio without breaking the bank. From selecting the right materials to laying the foundation, we’ve got you covered.
The first step in building your DIY patio is to decide on the size and design. Take some time to envision how you want your outdoor space to look and what purpose it will serve. Consider factors such as the size of your backyard, the amount of sunlight you get, and any existing features you want to incorporate into your patio. Once you have a clear idea of what you want, it’s time to start planning.
Next, gather all the necessary materials and tools. You’ll need items such as a spade, hammer, stakes, string, measuring tape, and a level. Depending on the design you choose, you may also need paving slabs, sand, gravel, fabric, and filler material. The range of materials available is vast, with options to suit every budget. If you’re looking to save money, consider using reclaimed or cheaper materials.
Before you start digging, you’ll need to make sure you have a solid foundation for your patio. This is where the spade and stakes come in. Use the stakes and string to outline the perimeter of your patio. Measure the area carefully to ensure it’s the size and shape you want. Once the outline is set, start digging. The depth of the hole will depend on the size of your patio, but a depth of around 4 to 7 inches is usually sufficient.
After you’ve dug the hole, it’s time to start laying the foundation. Fill the hole with a layer of gravel, then tamp it down with a tamper or the back of a spade. This will create a strong and stable base for your patio. Next, add a layer of sand or filler material and level it out. This will help to prevent any movement or sinking of the paving slabs over time.
Benefits of Creating an Affordable DIY Patio
Building an affordable DIY patio can have many benefits for homeowners. Whether you have a small or large outdoor space, creating a patio yourself allows you to customize the design to fit your needs and preferences.
One of the main benefits of a DIY patio is cost savings. By doing the project yourself, you can save money on labor fees and expensive equipment, making it a more affordable option compared to hiring builders or contractors. Additionally, DIY patio materials such as gravel, slabs, or plastic bases are cheaper than traditional alternatives, such as concrete or stone.
When it comes to installation, building a DIY patio is a straightforward process that doesn’t require specialized skills. With basic tools like a measuring tape, level, and a garden rake or screed, you’ll be able to create a strong and durable patio surface. You can check online for tutorials and step-by-step guides to help you along the way.
Another advantage of creating your own patio is the ability to customize and decorate the space according to your style and preferences. You can choose from a wide range of furniture and outdoor décor options to enhance the patio’s aesthetic appeal and make it a perfect fit for your outdoor living area.
Creating a DIY patio also allows you to improve your horticulture skills. You can design the patio to include a small garden bed or attach planters along the edges. It gives you the opportunity to grow your plants and herbs, expanding your gardening knowledge and adding to the overall beauty of your outdoor space.
Furthermore, building your own patio gives you the freedom to add additional features like an outdoor kitchen or a fire pit, depending on your needs and desires. You can connect utilities or add lighting fixtures as per your preferences, without the need to call in additional professionals or incur extra costs.
Lastly, creating an affordable DIY patio gives you the satisfaction of completing a project on your own. It provides an opportunity to learn new skills and take pride in the finished result. With some basic knowledge and willingness to learn, anyone can create a functional and stylish patio that will last for years to come.
In conclusion, there are many benefits to creating an affordable DIY patio. From cost savings to customization, improving horticulture skills to personal satisfaction, a DIY patio can be a great addition to your outdoor space.
Choosing the Right Patio Pavers
When it comes to designing an outdoor space, the patio is often the centerpiece. It’s a place where you can gather with friends and family, enjoy meals, or simply relax. Choosing the right patio pavers is an important step in creating a space that is both functional and visually appealing.
Factors to Consider
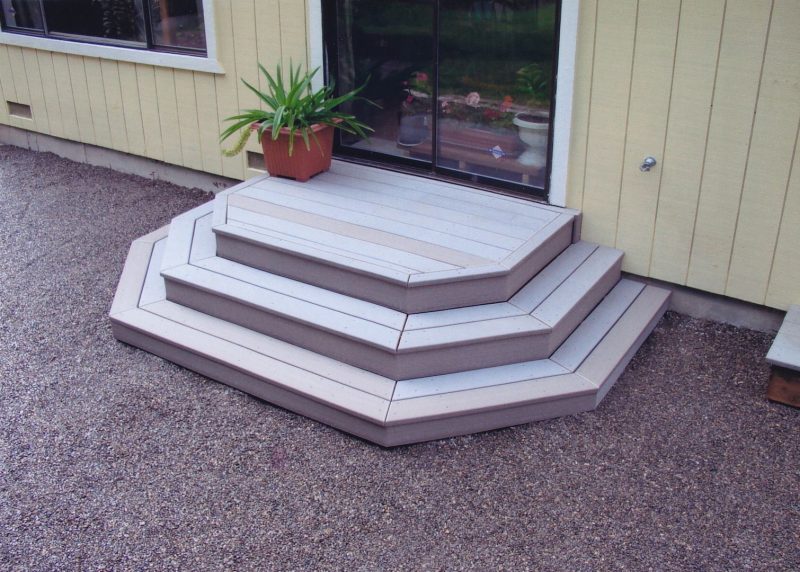
There are several factors to consider when choosing patio pavers. These include the size and shape of the pavers, the type of material they are made from, and the overall design of your outdoor space.
The size of the pavers will depend on the size of your patio. If you have a large patio, you might opt for larger pavers, while a smaller patio might require smaller pavers. The shape of the pavers can also vary, with options ranging from square or rectangular to more irregular shapes.
The material of the pavers is another important consideration. Common options include concrete, brick, and stone. Each material has its own advantages and disadvantages, so it’s important to choose one that fits your style, budget, and maintenance needs.
Choosing the Right Material

Concrete pavers are a popular choice due to their durability and affordability. They come in a wide range of designs, including those that mimic the look of natural stone. Brick pavers, on the other hand, offer a classic and timeless look. They can be laid in a variety of patterns, allowing for a customized design.
Stone pavers are another option, though they tend to be more expensive compared to concrete or brick. However, they are known for their natural beauty and can add a touch of elegance to your patio. Stone pavers can be made from materials such as granite, slate, or limestone, and each has its own unique texture and color.
Preparing the Foundation
Before you can lay your patio pavers, it’s important to prepare the foundation. This involves creating a level and stable base to ensure that your patio will last for years to come.
First, you should remove any sod or existing landscaping in the area where your patio will be. Next, mark out the dimensions of your patio using stakes and string. Use a shovel or edger to remove the top layer of soil, creating a level surface. It’s recommended to have a slight slope away from your home to ensure proper drainage.
After preparing the ground, you’ll need to add a layer of base material such as sand or crushed stone. This layer helps to provide stability and prevent the pavers from shifting. Use a tamper to compact the base material, ensuring that it’s level and firmly in place.
Laying the Pavers
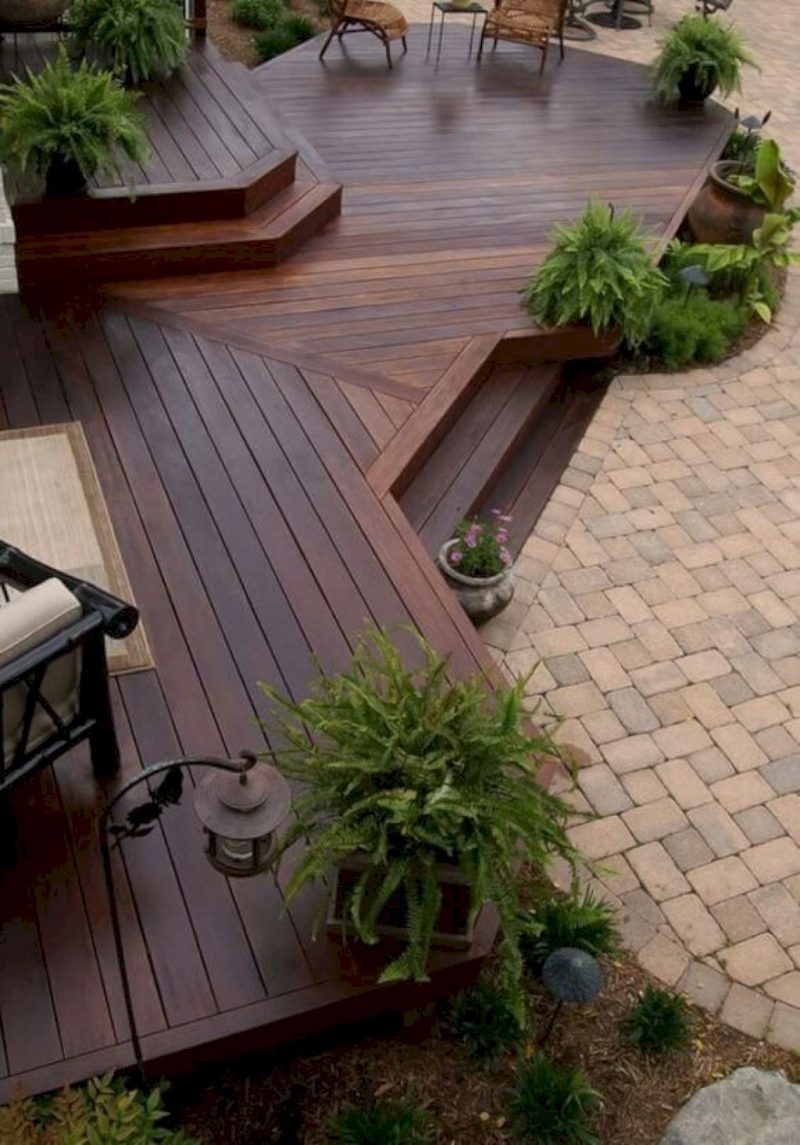
Once the foundation is prepared, it’s time to lay the pavers. Start by setting a row of pavers along one edge of your patio area. Use a rubber mallet to tap them into place, ensuring that they are level and aligned. Add a thin layer of sand or polymeric filler between the pavers to help set them in place and prevent weed growth.
Continue adding pavers in the desired pattern, working your way across and down the patio. Check the level frequently to ensure that the patio surface remains even. If needed, use a diamond blade saw to cut pavers to a specific size or shape to fit in the desired space.
Finishing Touches
Once all the pavers are in place, sweep sand or polymeric filler into the cracks between them to fill any gaps. This will help to stabilize the pavers further and create a finished look.
Finally, wait for the polymeric filler or sand to settle, and then lightly mist the patio with water. This will activate the filler and allow it to harden, locking the pavers in place. Give it a day or two to dry completely before adding any furniture or decorations.
In conclusion, choosing and installing the right patio pavers can greatly enhance your outdoor space. By considering factors such as size, material, and design, you can create a patio that fits your style and budget. With some basic DIY skills and a weekend’s worth of work, you can have a beautiful and functional patio that will last for years to come.
Measuring and Preparing the Patio Area
Before starting your DIY patio project, it’s important to measure and prepare the patio area properly. This step is crucial to ensure that your patio is built in the right size, shape, and location.
First, use a tape measure to determine the size of the patio you want to create. Typically, a 12×12 feet area is a good starting point for an average-sized patio. However, you can adjust the size based on your preference and available space.
Once you have decided on the size, mark the perimeter of the patio area using stakes and string. This will give you a visual guide of where the patio will be located and help with the next steps of the project.
Before digging, it’s important to call your local utilities to ensure there are no underground lines in the area. This step is crucial to avoid any accidents or damage to utility lines.
With the area marked and clear of any potential hazards, you can start digging. Use a spade or other handy tool to dig the area to the proper depth. A depth of 8 inches is usually recommended for a patio, but you might need to dig deeper if you plan to add an elevated or sunken patio.
Proper drainage is important for your patio’s longevity. To improve drainage, you can dig a slight slope into the patio area or add a layer of gravel or crushed stone. This will help water flow away from the patio and prevent any pooling or water damage.
Once the area is dug, it’s time to add a base material. This can be a layer of sand or gravel, which will help to level the patio area and provide a stable foundation for your patio. Make sure to tamp down the material to create a firm and level surface.
After the base material is in place, you can begin building the patio itself. If you’re using concrete, you will need to mix it according to the instructions and pour it onto the prepared area. Use a screed to even out the surface and create a smooth finish.
If you’re opting for a DIY patio kit or interlocking pavers, follow the provided instructions to properly lay the material. Make sure to align the seams and double-check that everything is level.
Having a strong and properly constructed patio is important for its long-term durability. Take your time during the preparation process and follow each step carefully. It may require several hours of work, but it will be worth it in the end.
By measuring and preparing the patio area correctly, you’re not only saving time and money by doing it yourself, but you’re also ensuring that your patio will provide many years of enjoyment. Plus, an outdoor patio is a great addition to your home and can add value when it comes to selling.
Don’t forget to check with your local authorities to see if any permits are needed before building your patio. Safety and adherence to local regulations are important to avoid any issues down the line.
In summary, when it comes to measuring and preparing your patio area, it’s important to take the time to do it right. Measure the area accurately, mark the perimeter, and check for any potential hazards. Dig to the proper depth, improve drainage, and add a solid base material. Then, follow the instructions for your chosen patio material and take the necessary steps to ensure a strong and durable patio.
How to Cut Patio Pavers
When starting your DIY patio project, it’s important to know how to cut patio pavers to ensure a proper fit and a seamless design. Here are the steps you need to follow:
- Gather the necessary tools: In order to cut patio pavers, you will need a spade, a level, a tape measure, a stake, a rubber mallet, and a masonry saw. These tools will help you prepare the area and ensure that the pavers are cut to the correct size.
- Prepare the area: Before you start cutting the pavers, you must prepare the area where the patio will be located. This includes checking for utilities and obtaining any necessary permits. Make sure the ground is level and properly compacted to create a solid foundation.
- Mark the lines: Use a stake and a string to mark the outline of your patio. This will serve as a guide for cutting the pavers and creating the desired shape.
- Cut the pavers: There are several options when it comes to cutting patio pavers. You can either use a masonry saw or opt for a handy alternative, such as a hammer and chisel. Follow the instructions provided with your tools and always wear protective gear.
- Set the pavers: Once you have cut the pavers to the correct size, you can start setting them in place. Make sure to leave a small gap between each paver for proper drainage and to prevent lippage. Use a rubber mallet to secure the pavers in the desired position.
- Check for level and alignment: It’s important to check for level and alignment as you go along to avoid any issues later on. Use a level to ensure that each paver is flat and in line with the others.
- Secure the pavers: To secure the pavers together, you have the option to either use mortar or a plastic edging. Mortar provides a more permanent solution, while plastic edging allows for flexibility in case any adjustments are needed in the future.
- Finish the edges: Finally, don’t forget to finish the edges of your patio. This can be done by using edging stones or by planting some landscaping along the perimeter. It will give your patio a polished look and help define the space.
By following these simple steps, you can create an affordable DIY patio and enhance your outdoor space. Cutting patio pavers may seem daunting at first, but with the right tools and instructions, it can be a rewarding project that adds value to your home.
Installing the Patio Pavers
One of the most important steps in creating your DIY patio is installing the patio pavers. This is the option that many DIYers choose because it is something that can be done without the need for professional help.
Before starting, make sure you have all the necessary tools and equipment on hand. You’ll need a shovel, a level, a garden hose, a hand tamper or plate compactor, a wheelbarrow, and safety gear.
Step 1: Plan and Measure
Start by planning the layout and measuring the area where you want to install the patio. Take into account any existing structures or landscaping features, as well as the size of your patio furniture. This will help you determine how large or small your patio should be.
Step 2: Prepare the Foundation
Remove any plants or other items from the area where the patio will be. Use a shovel to dig down about 6-8 inches, removing any grass or soil. Make sure the area is level and compact the soil using a hand tamper or plate compactor.
Step 3: Lay the Pavers
Starting from one corner, lay the patio pavers in the pattern of your choice. Don’t forget to check that each paver is level as you go. Use a rubber mallet to adjust the pavers if needed. Leave about a 1/8-inch gap between pavers to allow for joint sand.
Step 4: Spread Sand and Compact
Once all the pavers are in place, spread a layer of joint sand over the entire patio. Use a broom to sweep the sand into the cracks between pavers. Then, use a plate compactor to compact the pavers and settle them into place.
Step 5: Apply a Sealant (Optional)
Applying a sealant to the pavers is optional but can help protect them from stains and increase their longevity. Follow the manufacturer’s instructions for the sealant you choose.
Step 6: Add the Finishing Touches
Once the pavers are in place and any optional sealant has dried, you can add the finishing touches to your patio. This could include adding outdoor furniture, landscaping, or other decorative elements to enhance the space.
Remember, although installing patio pavers yourself may take some time and skill, it can be a cost-effective alternative to hiring a professional. Plus, the value it adds to your outdoor space and the satisfaction of completing the project on your own are priceless!
Enhancing Your Outdoor Space with the Finished Patio
Once you have completed the construction of your DIY patio using the step-by-step instructions provided, you’ll need to enhance it to create a beautiful and functional outdoor space. Here are 5 simple steps to help you enhance your patio:
1. Add Furniture
To make your patio more comfortable and inviting, attach a patio furniture set. Choose furniture items that are weather-resistant and suited for outdoor use. There are many options available, from dining sets to lounge chairs, so you’ll easily find something that suits your style and needs.
2. Create Planting Gardens
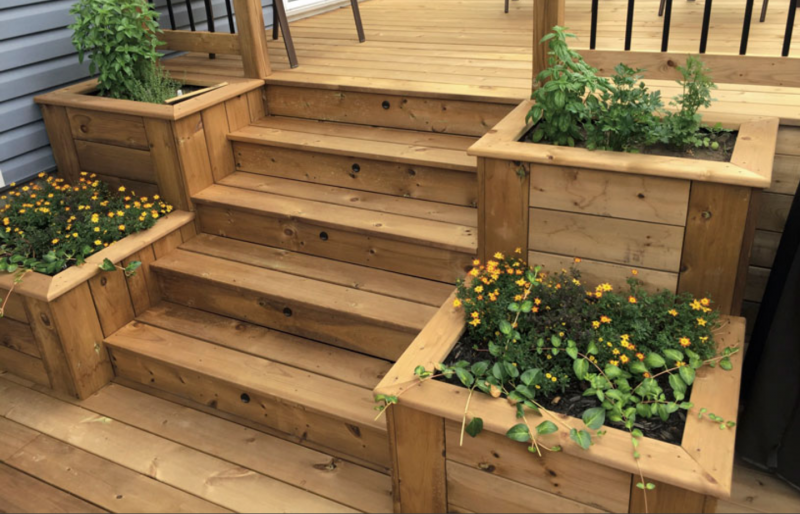
To add some greenery and beauty to your outdoor space, consider creating planting gardens around the perimeter of your patio. You can choose to plant flowers, herbs, or even vegetables, depending on your preferences. Use the space to express your creativity and create a vibrant and visually appealing patio area.
3. Finish with Limestone or Polymeric Sand
To give your patio a finished look, you can use either limestone or polymeric sand to fill in the gaps between the patio stones. This will not only provide a clean and polished appearance but also help prevent weed growth and keep the stones in place.
4. Add Utilities
If you want to make your patio more functional, consider adding utilities such as a kitchen area or a fire pit. This will allow you to enjoy outdoor cooking and dining, as well as create a cozy gathering spot for friends and family.
5. Enhance with Décor and Lighting
To add the final touches to your patio, consider adding decorative elements and lighting fixtures. This can include items such as outdoor rugs, throw pillows, lanterns, or string lights. These small details can make a big difference, creating a warm and inviting atmosphere in your outdoor space.
By following these steps, you’ll be able to transform your backyard into a beautiful and functional space that you can enjoy for years to come. You don’t need to be a professional builder to create your own patio, and with careful planning and a little bit of work, you can create a patio that adds value to your home and enhances your outdoor living experience.
| Pros | Cons |
|---|---|
| Great DIY project | Requires some construction work |
| Cost-effective | May need to remove existing utilities or structures |
| Customizable to your own preferences and size | Working with tools and materials |
| Adds value to your home | Requires some maintenance over the years |
| Elevated structure versus deck | May require permits or adhere to specific regulations |
Question-answer:
What tools and materials do I need to gather to create an affordable DIY patio?
To create an affordable DIY patio, you will need tools like a shovel, rake, tamper, level, and a wheelbarrow. Materials required include pavers, gravel, sand, landscape fabric, and edging.
Do I need any special tools or materials to create a DIY patio?
While you don’t need any special tools, basic gardening tools like a shovel, rake, tamper, and level will be necessary. As for materials, you will need pavers, gravel, sand, landscape fabric, and edging.
Are there any specific tools I need to gather for creating a DIY patio?
Yes, you will need a few specific tools like a shovel, rake, tamper, level, and a wheelbarrow. These tools will come in handy during the different steps of creating the DIY patio.
What are the necessary materials needed to create a DIY patio?
The necessary materials for creating a DIY patio include pavers, gravel, sand, landscape fabric, and edging. These materials will help to create the base and framework for your patio.
What are the basic tools and materials I need for a DIY patio project?
The basic tools you will need for a DIY patio project are a shovel, rake, tamper, level, and a wheelbarrow. In terms of materials, you will need pavers, gravel, sand, landscape fabric, and edging.


 Ultimate Guide How to Clean Outdoor Furniture for a Total Seasonal Refresh
 Stay Warm in Style with These 8 Smart Ways to Heat Your Outdoor Patio!
 A Comprehensive Guide to Building a Patio with Step-by-Step Instructions and Expert Tips